 By Nadia Khalis on October 12, 2026 at 5:36 am |



Home Lift Installation in Malaysia: Cost, Space Requirements & Process
You’ve chosen to move forward with a home lift, but now the practical questions start piling up. How much space do you genuinely need to clear? What does installation day actually involve? And how does all of this translate into the final cost you’ll be paying? Vague reassurances from a sales conversation don’t answer any of this concretely.
This gap between yes, it’ll work and understanding exactly what that means practically is where a lot of homeowners feel uncertain right up until installation day itself. Without concrete detail, it’s hard to prepare your home properly, budget accurately, or know what’s actually reasonable to expect once the installation team arrives.
This guide covers home lift installation in Malaysia in genuinely practical terms, space, cost, and process, so you know exactly what to expect at every stage.
Table of Contents
- Space-Saving Home Lift Requirements: What You Actually Need to Clear
- Home Lift Cost: How Space Requirements Affect the Final Number
- What Installation Day Actually Involves
- Home Lift Maintenance: What Happens After Installation
- Preparing Your Home Before the Installation Team Arrives
- Why Nibav Makes Installation Genuinely Straightforward
- What Makes Nibav’s Installation and Maintenance Approach Different
- Frequently Asked Questions
Space-Saving Home Lift Requirements: What You Actually Need to Clear
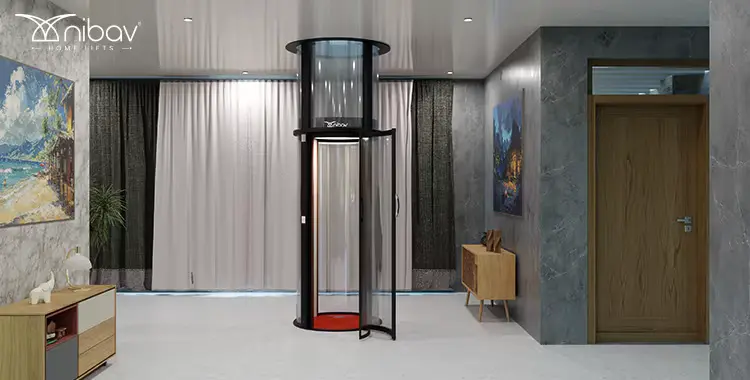
A self-supporting, space-saving home lift typically requires a clear floor footprint of roughly one to 1.4 square metres, depending on cabin size, plus adequate ceiling height to accommodate the full travel distance between floors. This space needs to be genuinely clear, not just visually open, so check for any hidden ductwork, wiring, or structural elements that might affect the exact position.
Beyond floor space, confirm there’s reasonable access for delivery, since components need to reach the installation site through your home’s existing doorways and corridors. Most residential installations manage this without issue, but it’s worth mentioning any unusually narrow access points to your supplier in advance rather than discovering a problem on installation day itself.
It’s also worth considering the space directly surrounding the installation area, not just the footprint itself. Adequate room for the installation team to work comfortably around the site speeds up the process considerably, while a cramped surrounding area, even if the lift itself fits, can slow down an otherwise straightforward installation.
Home Lift Cost: How Space Requirements Affect the Final Number
Home lift cost is directly influenced by the space and configuration your installation requires. A straightforward installation in an easily accessible, appropriately sized space typically costs less than one requiring additional site preparation, unusual positioning, or complications with delivery access.
When getting quotes, ask specifically whether your particular space presents any factors that might affect standard pricing. A supplier who identifies these details during an in-person site visit, rather than after signing a contract, gives you a far more accurate and trustworthy final cost from the outset.
What Installation Day Actually Involves
For a self-supporting, air-driven home lift, installation typically takes four to five working days from a prepared site. The process generally begins with positioning and securing the base structure, followed by assembling the cylinder and cabin components, which arrive largely pre-engineered rather than requiring extensive on-site construction.
Electrical connection and system testing typically occur toward the end of the installation window, followed by a final safety check and walkthrough with the installation team. Ask your supplier for a rough day-by-day breakdown in advance, so you know what to expect and can plan around any household disruption accordingly.
Noise and dust during this process are generally minimal compared to what most homeowners brace themselves for, particularly since there’s no excavation or demolition involved. Most households continue living relatively normally throughout the process, though it’s still sensible to plan around the specific days work is happening in that part of your home.
Home Lift Maintenance: What Happens After Installation
Once installation is complete, understanding home lift maintenance expectations helps you plan for the lift’s long-term reliability. Most self-supporting, air-driven models require relatively straightforward periodic servicing, checking seals, sensors, and the turbine motor, rather than the more extensive maintenance traditional hydraulic systems demand.
Confirm your specific maintenance schedule and what it covers before installation concludes, including how to contact your supplier if something needs attention between scheduled servicing visits. Having this information readily available from day one avoids uncertainty later when it’s actually needed.
Ask specifically how often scheduled servicing occurs and what it typically includes, so you can budget for this ongoing cost as part of your overall planning rather than treating it as an unexpected expense that arises later.
Preparing Your Home Before the Installation Team Arrives
In the days before installation, clear the designated area completely, confirm power supply access matches what your supplier specified, and inform other household members, including children or elderly family members, about the process and expected disruption, however minimal it typically is for this kind of installation.
If pets are part of your household, plan for their comfort during installation days specifically, since unfamiliar noise and activity, even at a relatively low level, can be stressful for some animals unaccustomed to visitors working in the home.
Why Nibav Makes Installation Genuinely Straightforward
Nibav’s installations are handled by our own trained technicians rather than third-party contractors, ensuring consistent quality and a clear point of contact throughout the four to five working day process. Every model is TÜV NORD certified, and our in-person site assessments confirm exact space requirements and cost before any work begins, removing the guesswork this guide addresses.
With a physical experience centre in Kuala Lumpur, you can also see the actual components and cabin dimensions in person before installation, helping you prepare your specific space with genuine confidence.
What Makes Nibav’s Installation and Maintenance Approach Different
Nibav provides a clear maintenance schedule from day one, backed by local, Malaysia-based technicians who handle servicing directly rather than routing requests through intermediaries. Combined with a warranty of up to 25 years on select models, Nibav treats installation as the beginning of an ongoing relationship, not the end of the transaction.
Frequently Asked Questions
How much floor space does a home lift installation actually require?
Most self-supporting models need roughly one to 1.4 square metres of clear floor space, plus adequate ceiling height for the full travel distance between floors.
How long does home lift installation take in Malaysia?
Self-supporting, air-driven models typically install within four to five working days once the site is prepared, significantly faster than traditional hydraulic elevator installations.
Does home lift installation cost vary based on my specific space?
Yes. Unusual access requirements or additional site preparation can affect final cost, which is why an in-person site assessment before finalising a quote is important.
What maintenance does a home lift require after installation?
Most air-driven models need periodic checks of seals, sensors, and the motor, generally simpler than the maintenance traditional hydraulic elevators require.
How should I prepare my home before installation day?
Clear the designated area completely, confirm power access matches specifications, and inform household members, including any pets, about the process and expected activity.